Developing a recipe for tasty gluten-free crepes to be made at home truly from scratch took me longer than expected. Not only had the crepes to be soft and tasty but also be good for sweet and savory fillings alike. And, of course, these gluten-free crepes were not supposed to break when forming them into a roll or folding them into a different shape. Also, I wanted them to have a very nice, “wheat-like” taste and feeling without, of course, having wheat or another gluten-containing flour as an ingredient.
No Gluten-Free Flour Mixes from the Supermarket
Going with a gluten-free flour blend bought at a supermarket was no option for me. These kind of flour mixes mostly consist rice flour only and, honestly, I am not too big a fan of rice flour for its somewhat boring taste. In my opinion, other gluten-free flours (like for example teff flour) are much better suited to be the main flour in gluten-free crepe batter.

Dry Ingredients: Teff Flour, Brown Rice Flour, Tapioca Starch, Salt and Sugar (Gluten-Free Sweet and Savory Crepes).
As dry ingredients for a gluten-free crepe batter, I use teff flour, brown rice flour, tapioca starch, salt and sugar (for sweet crepes only).
Gluten-Free Flours
I like teff flour, which is a kind of millet flour, for its very pleasant taste and its good binding properties. It is a very good gluten-free flour for both, sweet and savory pancakes, as it has a mild aroma and a slightly jellylike consistency which helps the gluten-free batter stick together.
There is another gluten-free flour, namely buckwheat flour (has nothing to do with wheat!), which is also good for making pancakes for its strong mucus-forming grains. But buckwheat flour has a strong, distinctive taste which not everyone likes and which, in my opinion, does not work well with savory pancakes.
Another gluten-free flour I tried was sorghum flour (also a kind of millet flour). The taste of sorghum flour was really good but it did not work with crepes. Every time I tried to turn a sorghum flour crepe in my pan (either using a turner or flipping it) it would break apart.
Though, as I already mentioned, I do not like the bland taste of rice flour too much, I think it is very helpful for its sticky consistency. But using rice flour also means a more rubberlike consistency developing over time – of both, batter and baked crepes. Therefore, it is important the batter is processed immediately and not stored in the fridge. The ratio 2/3 teff flour and 1/3 brown rice flour worked best for me.
Gluten-Free Starch
Finally, I added tapioca starch to the crepe batter. Tapioca starch seemed the perfect fit as it is a good binding agent which makes doughs smoother so you can better work with them.
Gluten-Free Binding Agents
There was no use adding binding agents like locust bean gum powder or psyllium seed husk powder to the crepe batter. I could see no improvement whatsoever in the consistency of my crepes when adding 2 teaspoons of locust bean gum powder to the batter. Also, when using psyllium seed husk powder the only thing I noticed was my batter becoming very thick in a short period of time which prevented me from making the thin crepes I needed.
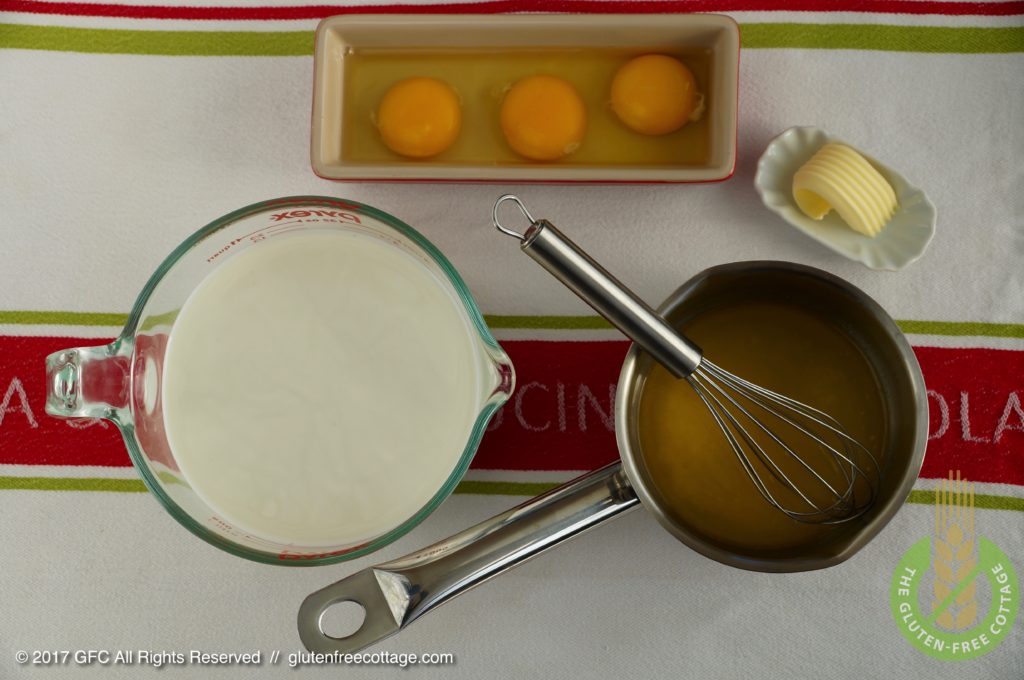
Wet Ingredients: Whole Milk, Eggs, Melted Butter (Gluten-Free Sweet and Savory Crepes).
For the wet ingredients mix you only need to mix whole milk, eggs and melted butter. Eggs are very important for gluten-free baking as they are natural binding agents. Yolks are also very good emulsifiers (i.e. they combine fat and water).
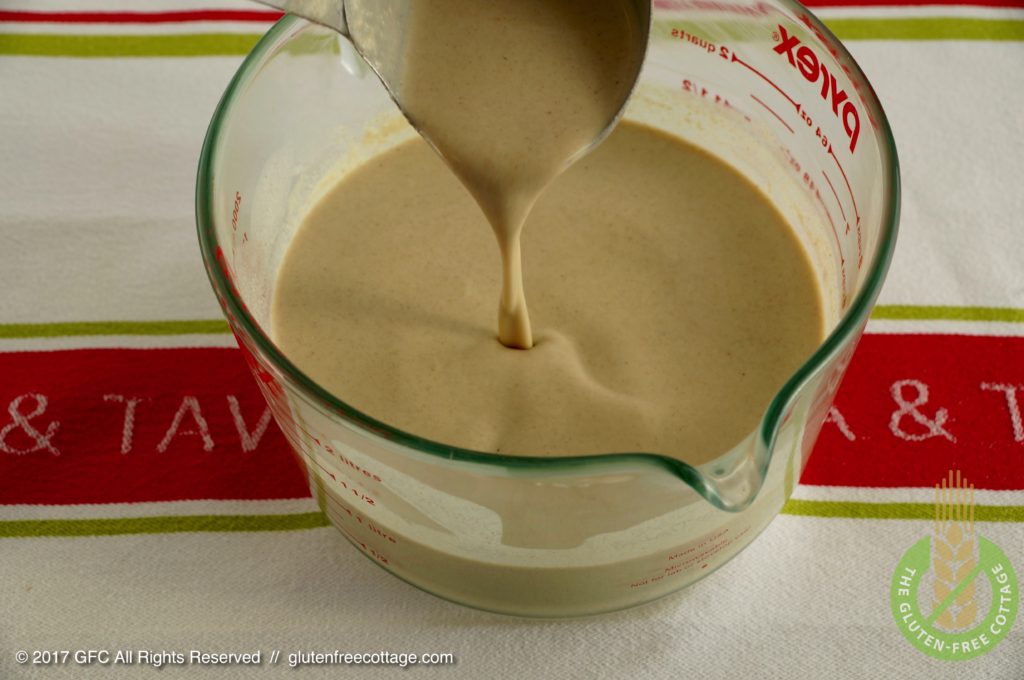
The combined crepe batter needs to have a quite thin consistency (gluten-free sweet and savory crepes).
Make Thin Batter
The crepe batter should be quite liquid so you don’t have any trouble spreading it evenly by turning the pan slightly (no need to buy an extra crepe spreader).
No Extra Baking Butter Needed
Thanks to the melted butter already in the batter it is not necessary to use extra butter when baking the crepes in a non-stick crepe pan. This not only makes the baking process itself less stressful but also helps cut calories.
Process Immediately
One thing I noticed is that it is quite important to process the crepe batter immediately. All the times I put excess crepe batter in my fridge for later use, it developed a more rubber like consistency after some time which made problems when baking crepes. The inner part of the crepe blew up like a balloon and did not bake, whereas the outer dough ring started to burn. As a consequence, I could not turn the crepe to the other side and had only half-baked pieces left. I assume it is the rice flour in the batter which causes this unwanted behaviour.
Stir Batter Regularly
Also, one thing you will see is that after some time the flour will start sinking to the bottom of the bowl which causes the upper part of the batter to become more liquid. That’s why it is important to always stir the batter shortly with your whisk before pouring it onto the bottom of your crepes pan (best use a ladle with a volume of approx. 100 ml or 1/3 cup) .
And should you have the feeling, that the batter becomes thicker over time, feel free to add a little bit of milk.
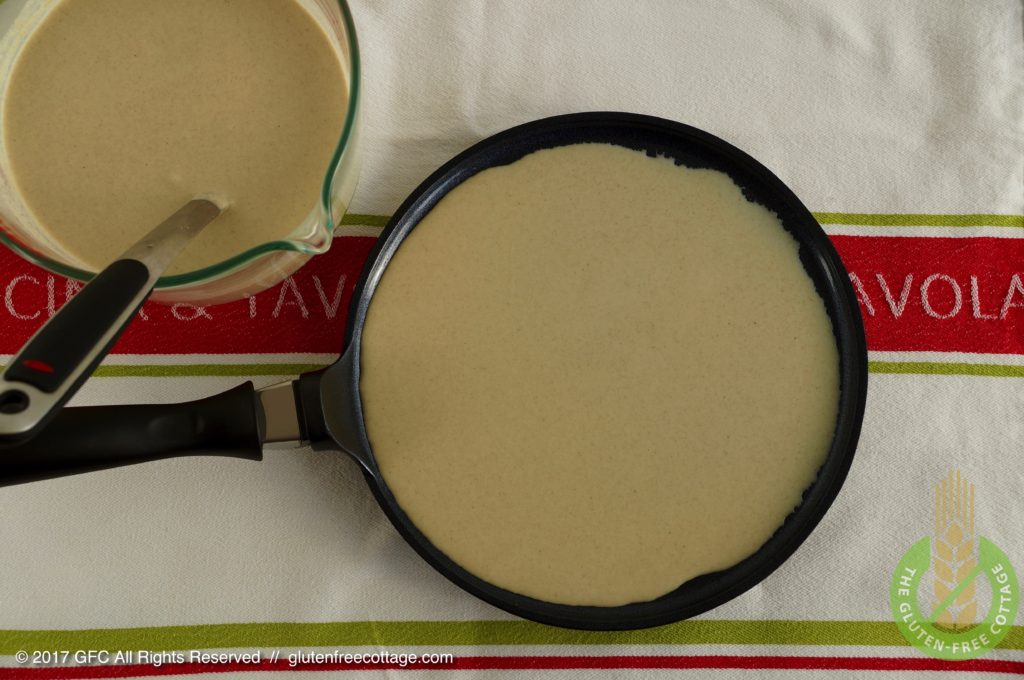
The bottom of the non-stick crepe pan needs to be covered by a thin layer of batter (gluten-free sweet and savory crepes).
Use Non-Stick Crepe Pan
As crepes are supposed to be really thin by nature, it is very important to use a non-stick crepe pan. Every other pan – and here I speak from experience – will cause the crepe to glue to the bottom of the pan. Using a non-stick pan also helps using much less butter. In fact, as there is already melted butter in the batter, you do not need to use any extra butter at all. Just pour the batter in the crepes pan and let bake, and that’s it.
Let Crepe Pan Cool
Nearly equally important is the fact that the crepe pan must not be too hot when pouring batter onto it. Excess heat of the crepe pan will cause the gluten-free batter to tear apart and therefore plenty of small and bigger holes will develop in the crepe throughout baking. According to my experience, it is best to wait about one minute between taking one crepe out and pouring the batter for the next crepe into the crepe pan.
Make Thin Layers
When you take one spoonful (ladle) of batter and pour it into the crepe pan, try to make as thin a layer of batter as possible. Tilt the pan so that the batter completely covers the bottom of the pan. Remove excess batter. Remember, we are making crepes and not pancakes (which are smaller and thicker).
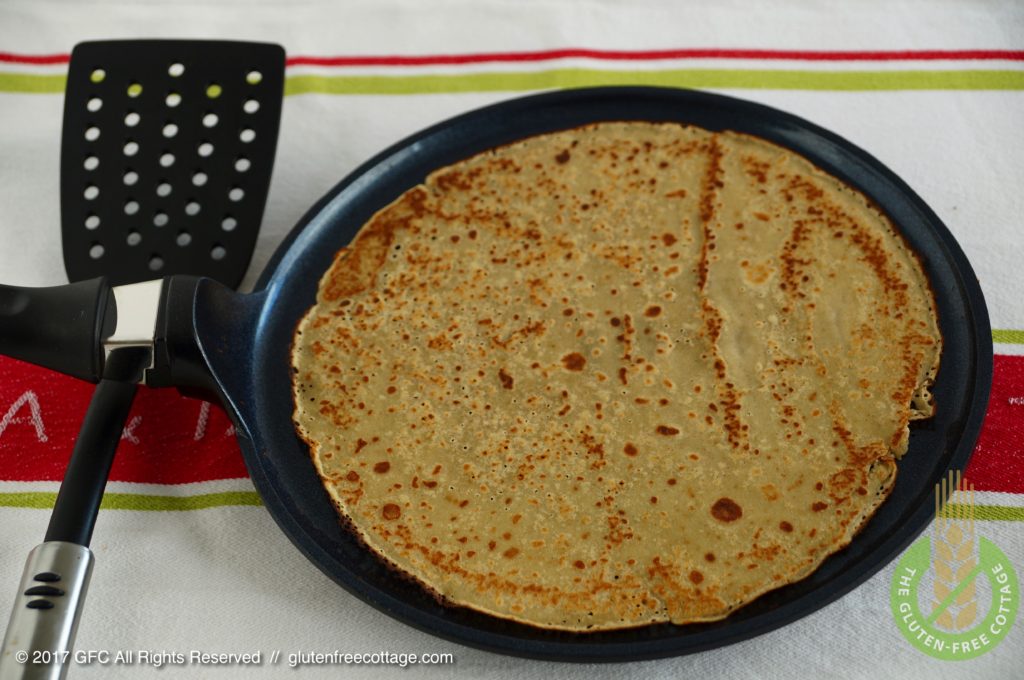
Best use a non-stick turner to swiftly turn the crepe (gluten-free sweet and savory crepes).
Use Non-Stick Turner to Turn Crepe
When one side of the crepe is baked (after approx. 1-1/2 minutes), take your non-stick turner, slide it underneath the crepe, and quickly turn it to the other side to let bake for another 1/2 minute. Make sure that the bottom part of your crepe is sufficiently baked (brownish and feeling a little bit stiff in the middle) before turning as otherwise the crepe may tear apart during the turning process.
Problems When Simply Flipping a Gluten-Free Crepe Over
There is, of course, always the possibility to just flip the crepe over without using any other devices. This works fine with normal – gluten-containing – batter. But with gluten-free dough, I have had my problems so far. Not only that the gluten-free batter sticks more to the pan thanks to the rice flour ingredient, but it also is quite difficult to bring it back in shape again once the flipping over did not go so well. Then, the gluten-free batter would rather tear apart than allowing to be smoothed again (like, for example, a gluten-containing wheat flour crepe would).
Let Baked Crepe Rest Shortly
As soon as the crepe is finished baking, let it glide out of the crepes pan onto a plate. Let the crepe rest for about 1 minute before trying to make a roll out of it or trying to fold it as gluten-free crepes may break relatively easy directly after baking.
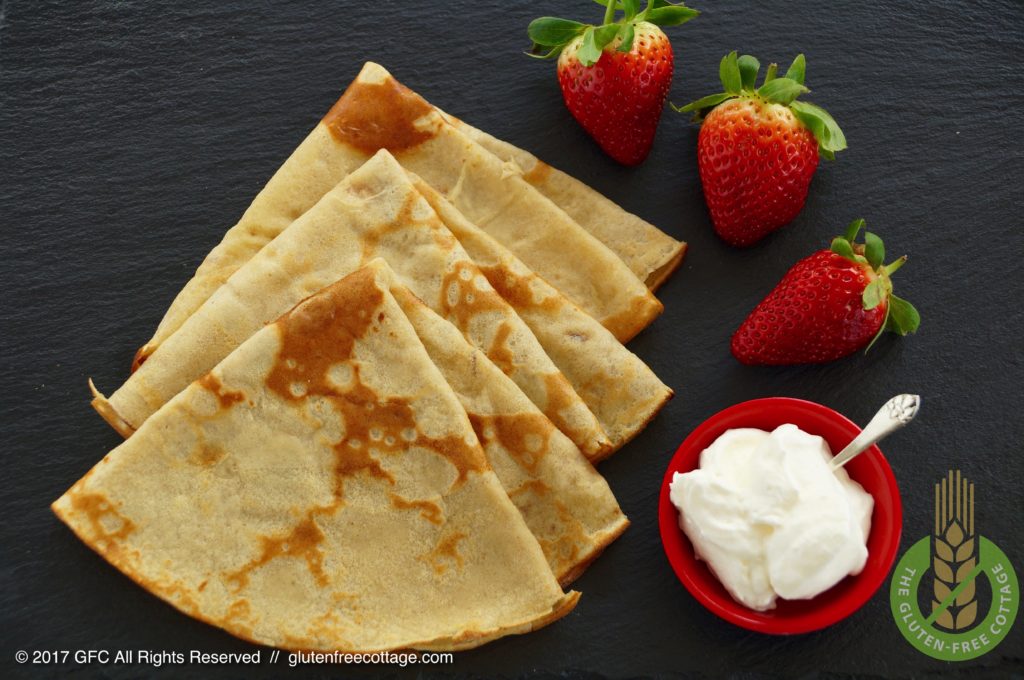
Enjoy your soft and tasty gluten-free crepes with strawberries and whipped cream!
My Recipe:
Gluten-Free Sweet & Savory Crepes
| Prep time: | Bake time: | Total time: | Yield: |
|---|---|---|---|
| 10 mins | 45 minutes | 55 minutes | 12 crepes |
INGREDIENTS
* GLUTEN-FREE DOUGH (12 crepes with diameter of 24 cm/ ≈10 in.):
Dry Ingredients:
- 120 g [≈ 1 cup minus 1 TBS] finely ground teff flour (whole grain)
- 60 g [≈ 1/2 cup] finely ground brown rice flour (whole grain)
- 20 g (≈ 3 TBS) tapioca starch
- 1/2 tsp. salt (add another 1/4 tsp. of salt if you are making savory crepes)
- 2 TBS granulated sugar (no sugar if you are making savory crepes)
Wet Ingredients:
- 800 ml [≈ 3-1/2 cups] whole milk
- 3 medium eggs
- 50 g [≈ 4 TBS] unsalted butter, melted
* FILLING:
- fresh strawberries
- whipped cream with sugar (to your taste)
DIRECTIONS
- Mix all “dry ingredients” in a mixing bowl.
- Pour all “wet ingredients” in a separate jar and stir.
- Combine all ingredients to a thin batter, using a whisk or a hand mixer. Mix thoroughly so there are no lumps in the batter. Process immediately (do not store).
- Heat a non-stick crepe pan until medium warm.
- Take one spoonful (ladle) of batter and pour into pan. Spread evenly to get a thin layer of batter (crepes are bigger and much thinner than pancakes).
- Bake for approx. 1-1/2 minutes at medium heat, then carefully turn (best use a non-stick turner) and bake for another 1/2 minute.
- Let crepe slide out of the pan onto a plate and let rest for about 1 minute before making a roll or trying to fold it (otherwise it might break).
- Let crepe pan cool for 1 minute before baking the next crepe.
- Enjoy your soft and tasty gluten-free crepes with strawberries and whipped cream!
Tips & Tricks:.
- It is important to stir the batter shortly each time before making the next crepe as the flour in the batter has the tendency to sink to the bottom.
- Made too many crepes? In Austria, we like to use them for consomme celestine. We cut excess or mis-shapen baked crepes into long thin strips and add them to our beef or chicken broth. These crepe strips can also be stored conveniently in the freezer for later use.
- Alternative fillings for sweet crepes are apricot marmalade, chocolate cream or ice cream.
- If you want to make savory crepes (omit sugar in the batter), you may want to use spinach-feta or mushroom-parsley fillings. They are very healthy and super delicious!
NOTES:
g = gram
ml = milliliter
TBS = tablespoon = 15 ml
tsp. = teaspoon = 5 ml
1 cup = 1 cup [US] = 235 ml = 16 tablespoons (TBS)
1 stick of butter = 1/2 cup = 113 g (= 4 oz. = 8 TBS. = 24 tsp.)
1 pound (lb.) = 0.454 kilograms (kg) = 454 grams (g)
1 ounce (oz.) = approx. 28 grams (g)
1 inch (in or “) = 2.54 centimeters (cm) = 25.4 millimeters (mm)
1 liter = 1,000 ml = 1.0567 US quarts (liquid)
1 quart = 1 US quart (liquid) = approx. 0.946 liters
The Gluten-Free Cottage (GFC)
© 2017 GLUTENFREECOTTAGE.COM ALL RIGHTS RESERVED
Arma says
I have tried this recipe a couple of times and varied the flours, but teff flour seems to be the best. Thank you so much for creating this recipe! The other recipes on the web didn’t work that well for me. I have looked through all the other recipes you have created and they all look so good!