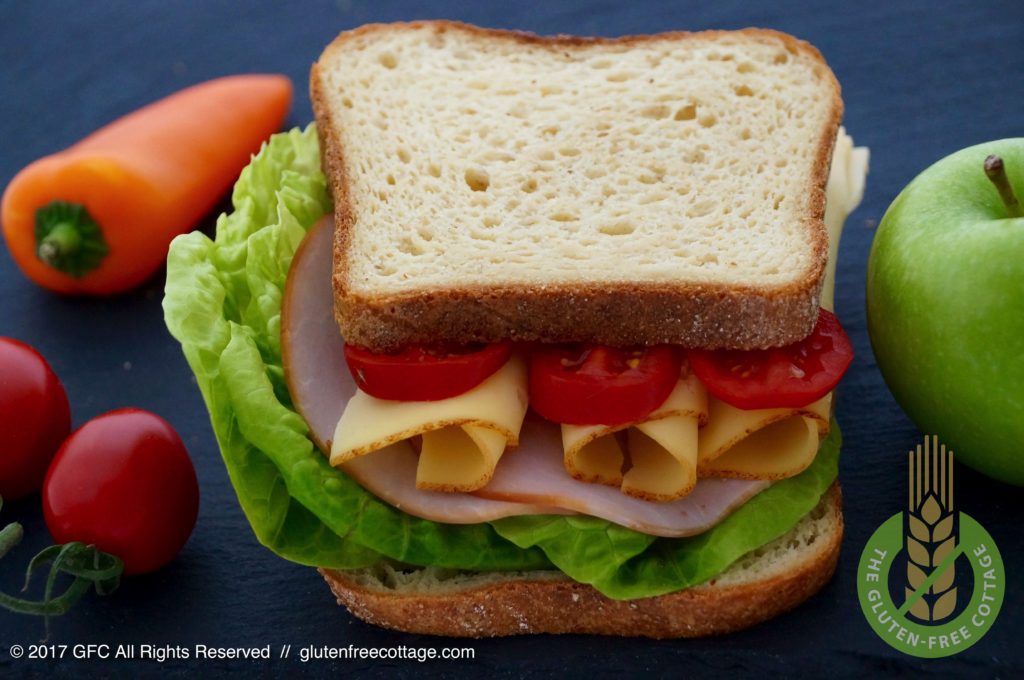
Gluten-free sandwich bread for school. After years of buying it at one of our local supermarkets, my kids decided they did not like it any more. They found it way too dry and crumbly and tasteless. So I had my next project: homemade gluten-free sandwich bread.
Choice of Ingredients
Most importantly, the gluten-free sandwich bread had to be really soft and moist at the inside and, of course, taste good. So, simply using a rice flour mixture would not do. And buying a bread flour mix at the supermarket neither. After all, these ready-made bread flour mixes mainly consist of rice flour and cornstarch, which tastes a bit dull sometimes. And I really like to make gluten-free sandwich bread according to my taste. So, being able to change one or more of the ingredients is very important for me.
Problematic Ingredients of Industrially Baked Products
But this is not the only reason why I am making gluten-free bread, cakes, cookies, and so on from scratch. Have you ever taken the time to read through all the ingredients of gluten-free bread bought at the supermarket? Probably not. I mean, everyone is already happy to find gluten-free baked goods which are somewhat tasty and show a nice feeling in the mouth, right? And, of course, it is much more convenient to buy these products instead of having to make them at home from scratch.
But, truth be told, I do have the feeling there are simply too many unhealthy ingredients used in industrially baked goods. Why, for example, do you find “hydropropyl methylcellulose (HPMC)” in some gluten-free white breads? Or soy protein? And what about the wide-spread use of palm oil in, for example, gluten-free cookies? Not to mention all the food processing aides (carriers) which need not be mentioned on the packages but may be harmful for our health?
Developing a Recipe for Homemade Gluten-Free Sandwich Bread
So, all the more reason for me to try hard and develop a recipe for really good gluten-free sandwich bread, one that is crunchy at the outside and at the same time soft and moist at the inside. And that is how it is done:
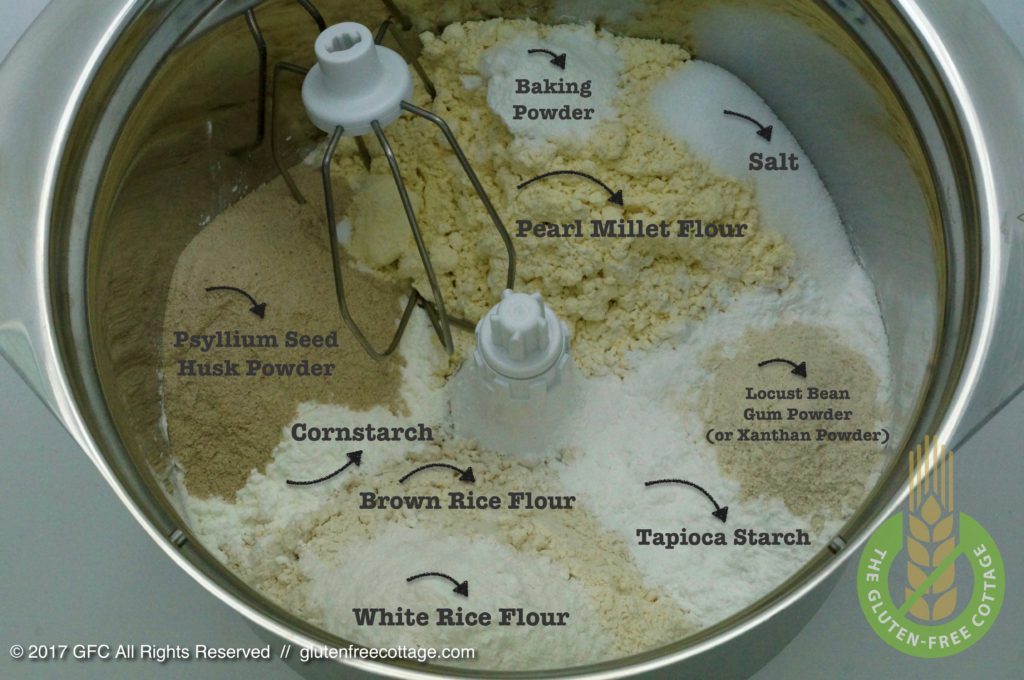
Dry ingredients: gluten-free flours, starches and binding agents, baking powder and salt (gluten-free sandwich bread).
First, prepare and carefully weigh your “dry ingredients” which mainly consist of gluten-free flours, starches and binding agents. With gluten-free baking, it does make a big difference if you add too much or too little of the required ingredients. So, being precise is important and it is the reason why I am using both, European and US American measurements (grams, liters, cups, and so on) in my recipe below.
Next, put all ingredients in a big enough bowl and mix them for a short time so that they are evenly distributed in your dough.

Wet ingredients: milk, unsalted butter, egg, water, apple cider vinegar and orange juice (gluten-free sandwich bread).
Now, heat all “wet ingredients” but orange juice and apple cider vinegar in a small saucepan until medium warm so that the butter pieces start to melt and whisk shortly. It is important to not yet add orange juice and apple cider vinegar as they may cause the milk to curdle.
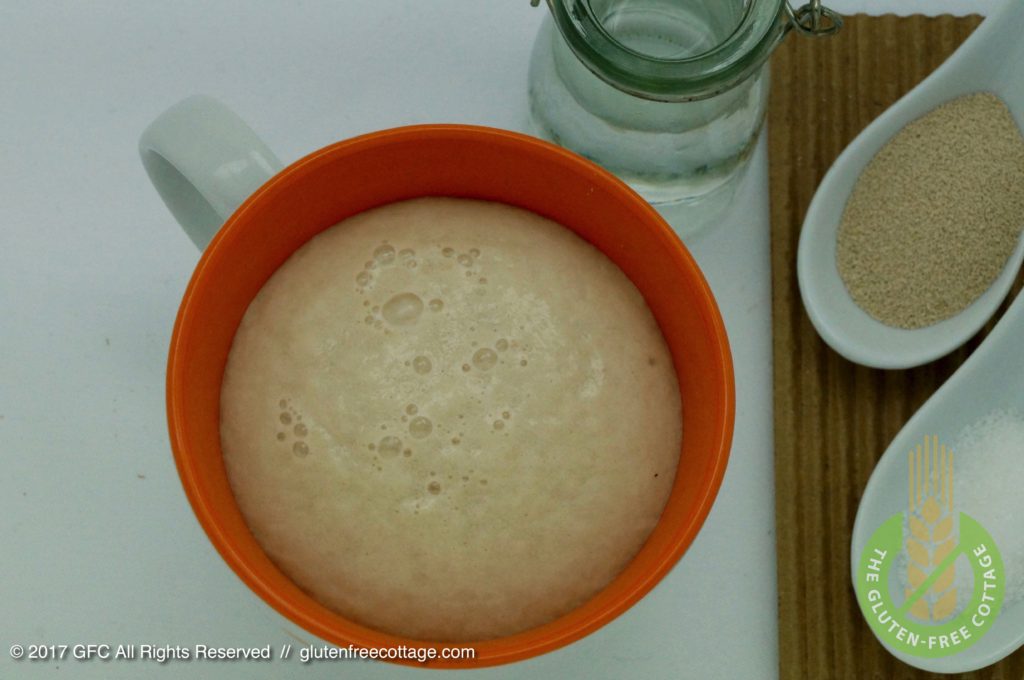
Yeast ingredients: active dry yeast, granulated sugar and water (gluten-free sandwich bread).
Next make the proof of the yeast. This is actually quite easy to make. You only need to combine active dry yeast, white sugar and warm water and let stand for a few minutes until the yeast mixture grows by itself and shows bubbles at its surface.
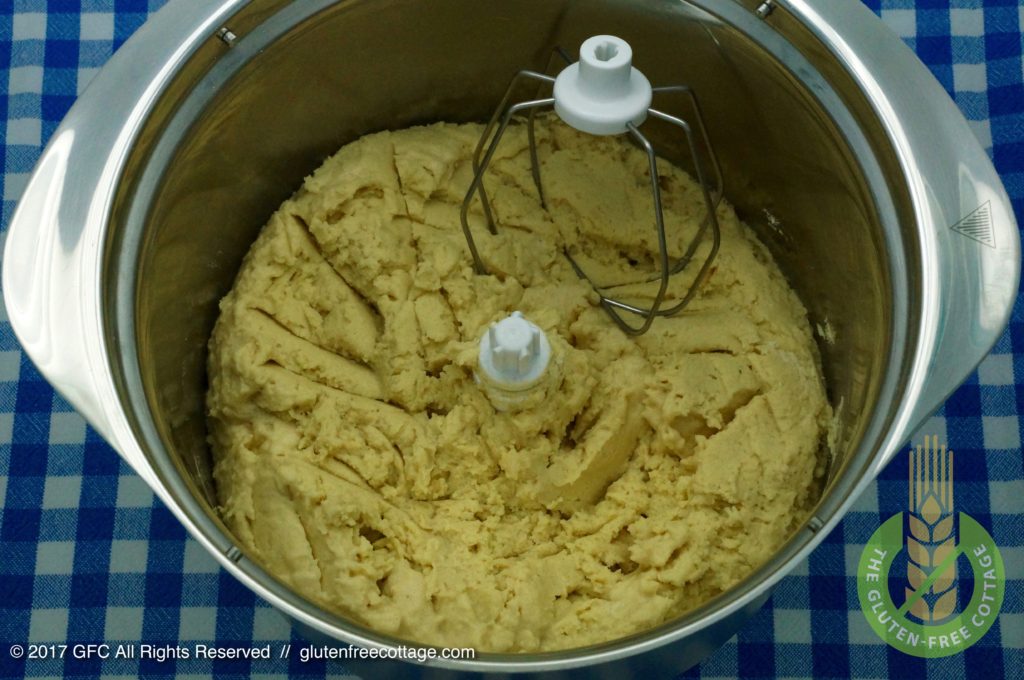
Combine dry, wet and yeast ingredients to a sticky dough (gluten-free sandwich bread).
When the yeast is ready, combine all dry, yeast and wet ingredients (and orange juice and apple cider vinegar) and mix them with your electric mixer for about half a minute. The dough should be not too soft but not too dense, either.
If the dough is too soft, the sandwich bread will first rise quite fast but then get a flat surface shortly after you take it out of the oven (the bread slices then look like a butterfly). And if it is too dense, the dough may not rise well and you will end up with dense and heavy bread.
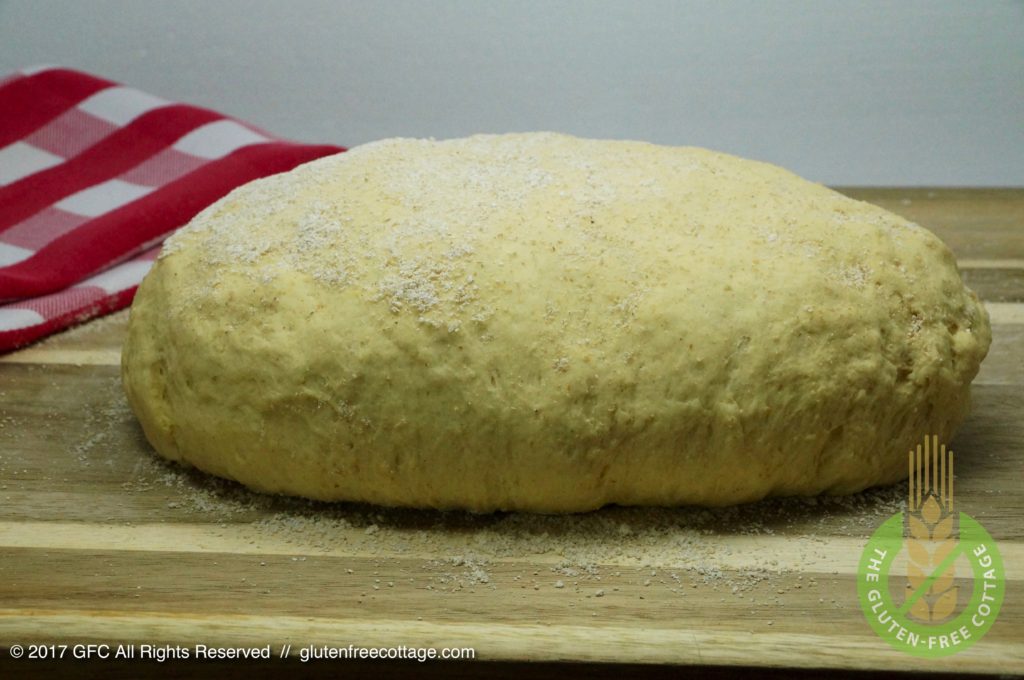
Let dough rise twice (gluten-free sandwich bread).
The gluten-free sandwich bread dough needs to rise twice, then. The first rise will be for about 40 minutes, until the dough has approx. doubled. It is easiest to place the dough bowl in a warm water bath (i.e. in a much bigger bowl containing very warm or hot water) and cover it with a towel.
After the first rise, scrape the dough out of the bowl and knead it shortly by hand on a floured surface. Form a loaf and let it rise for another 20 minutes at a warm enough place (second rise). According to my experience, the dough rises best if you sprinkle the loaf with a little bit of flour and cover it first with a plastic foil and then with a towel on top.
Now it is time to preheat the oven to 270 °C (≈ 520 °F) and place an empty cast-iron baking pan (with lid) in it. When the oven has reached its temperature and the second dough rise is completed, take the now hot cast-iron baking pan out of the oven, remove the (hot) lid, sprinkle the bottom of the pan with a little bit of flour and carefully let the raw dough loaf glide inside. Now cover the baking pan again with the lid and place it back in the oven. Bake the sandwich bread for 30 minutes, then remove the lid and bake for another 10 to 15 minutes. Let cool for about 30 minutes.
Use of a Cast-Iron Baking Pan
I tried a couple of times using a “normal” baking pan for my gluten-free sandwich bread but was never happy with the result. The sandwich bread seemed to always burn on top and be only half-baked at the bottom, no matter how long I left it in the oven.
Then I decided to change the material of my baking pan. So far, my experience with using cast-iron baking devices for gluten-free baking was very good. I was first thinking of using my oval cast-iron Dutch oven which I use for baking gluten-free brown bread. But I also wanted to have the typical square shape of sandwich breads. After doing some research I found a special cast-iron baking pan with lid for baking sandwich breads. The lid is important as it keeps the moisture in the baking pan and makes for a crunchy crust at the outside and a moist and soft center at the inside of the sandwich bread. And this solved my problem entirely!
Enjoy your crunchy and at the same time very soft and chewy gluten-free sandwich bread!
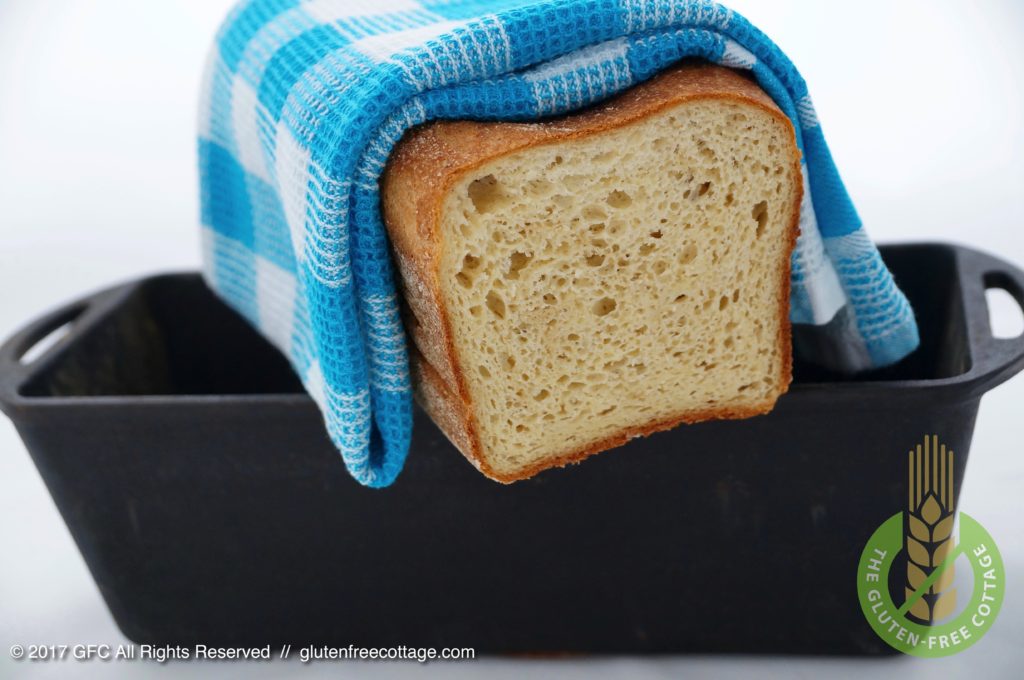
Crispy, soft and chewy bread baked in a cast-iron baking pan (gluten-free sandwich bread).
My Recipe:
Gluten-Free Sandwich Bread
| Prep time: | Rise & Bake time: | Total time: | Yield: |
|---|---|---|---|
| 20 mins | 100 mins | 2 hours | 16 slices |
INGREDIENTS
Dry Ingredients
- 200 g [≈ 2 cups] pearl millet flour
- 180 g [≈ 1-1/2 cups] brown rice flour
- 20 g [≈ 2 TBS] white rice flour
- 50 g [≈ 1/3 cup plus 1 TBS] tapioca starch
- 50 g [≈ 1/3 cup plus 1 tsp.] cornstarch
- 2 TBS psyllium seed husk powder
- 2 tsp. locust bean gum powder (or xanthan powder)
- 1/2 tsp. baking powder (gluten-free)
- 2 tsp. salt
Wet Ingredients
- 200 ml [≈ 1 cup minus 2 TBS] water
- 200 ml [≈ 1 cup minus 2 TBS] milk
- 60 g [≈ 4 TBS] unsalted butter, in pieces
- 1 medium egg
- 2 TBS orange juice
- 1 TBS apple cider vinegar
Yeast Ingredients
- 2 tsp. granulated active dry yeast
- 1 tsp. granulated white sugar
- 100 ml [≈ 1/2 cup] tab water, lukewarm
DIRECTIONS
- Make yeast dough: Place all “dry ingredients” in a big bowl and mix shortly with an electric mixer.
- Put all “wet ingredients” (except orange juice and apple cider vinegar) in a saucepan and heat until medium warm. Beat shortly until butter is dissolved.
- Mix all “yeast ingredients” in a small cup to make proof of yeast and let rest for a few minutes until small bubbles develop on the surface.
- Combine all dry, yeast and wet mixtures (plus orange juice and apple cider vinegar) and mix with an electric mixer for about half a minute.
- First rise: For first rise, place mixing bowl in a warm water bath and let rise for about 40 minutes (until dough has approx. doubled).
- Then scrape dough out of mixing bowl, place on floured surface and knead shortly by hand.
- Second rise: Let dough rise again at a warm enough place for about 20 minutes (second rise). Sprinkle flour on top of dough and cover with plastic foil and a towel.
- In the meantime, preheat oven to 270 °C (≈ 520 °F) and place empty cast-iron baking pan with lid in it.
- When dough is ready, take the (hot!) baking pan out of oven, remove lid and sprinkle bottom with flour. Carefully let dough glide inside the baking pan. Put on lid and place in oven again.
- Bake in oven: Let bake for 30 minutes with lid. Then remove lid, reduce temperature to 220 °C (≈ 430 °F) and let bake for another 10 to 15 minutes.
- Take bread out of the oven, place on grid and let cool for about 30 minutes.
- Enjoy your crunchy (outside) and at the same time very soft and chewy (inside) gluten-free sandwich bread!
Tips & Tricks:
- Liquids like apple cider vinegar or orange juice may cause milk to curdle and should therefore be added separately to the dough.
NOTES:
g = gram
ml = milliliter
TBS = tablespoon = 15 ml
tsp. = teaspoon = 5 ml
1 cup = 1 cup [US] = 235 ml = 16 tablespoons (TBS)
1 stick of butter = 1/2 cup = 113 g (= 4 oz. = 8 TBS. = 24 tsp.)
1 pound (lb.) = 0.454 kilograms (kg) = 454 grams (g)
1 ounce (oz.) = approx. 28 grams (g)
1 inch (in or “) = 2.54 centimeters (cm) = 25.4 millimeters (mm)
1 liter = 1,000 ml = 1.0567 US quarts (liquid)
1 quart = 1 US quart (liquid) = approx. 0.946 liters

The Gluten-Free Cottage (GFC)
© 2017 GLUTENFREECOTTAGE.COM ALL RIGHTS RESERVED